I’m back! In my mind I have always said I will not apologise if I take a break from blogging, whether intentional or not, as this is supposed to be fun and not a burden. So in the last few … Continue reading
I’m back! In my mind I have always said I will not apologise if I take a break from blogging, whether intentional or not, as this is supposed to be fun and not a burden. So in the last few … Continue reading
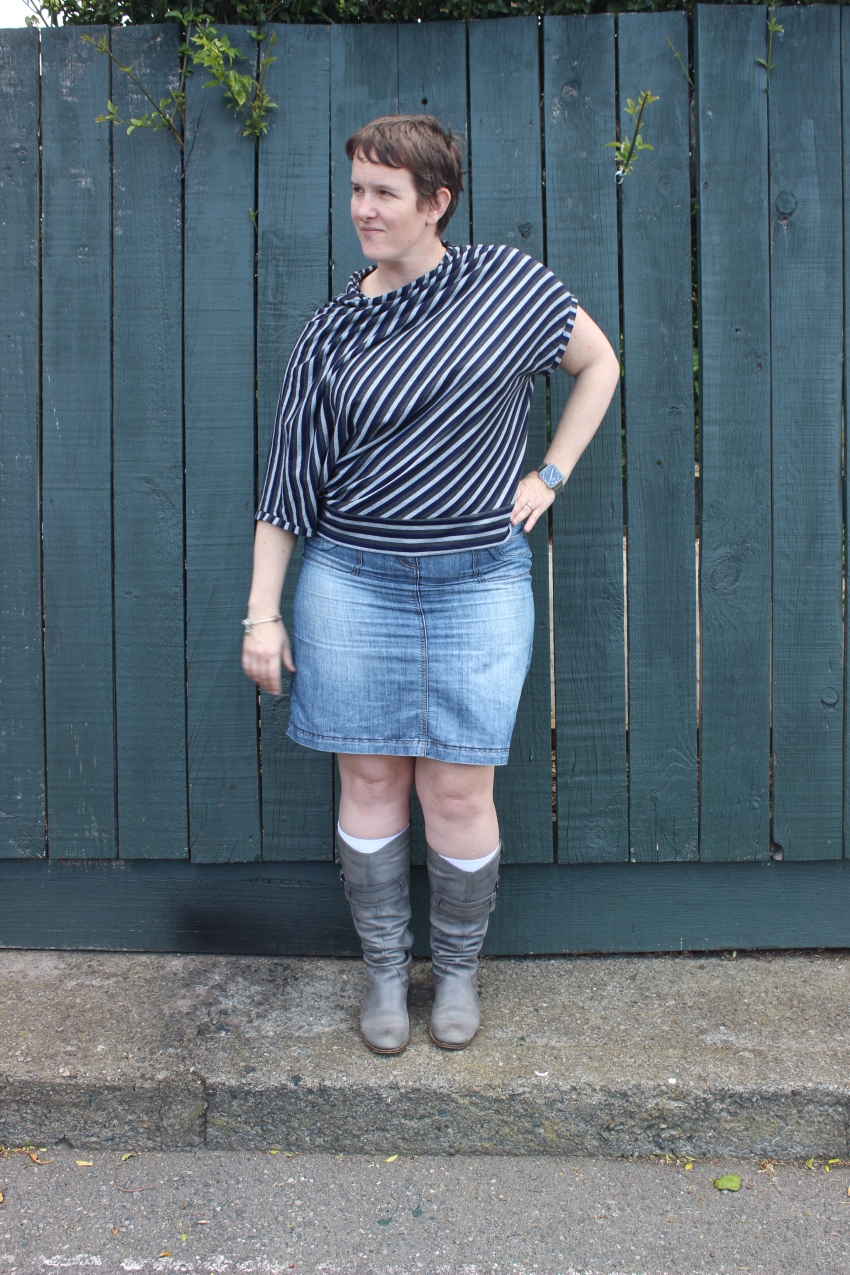
A friend gave me an asymetric back knit top a few years ago. I have always intended to take a pattern off it as it is quite unique and late last year I finally got around to it. I basically … Continue reading
I was really lucky to win a copy of So Zo’s Dolores batwing top. This is one of first blogs I followed and I have always liked her style. I also love batwing tops so I got onto it right away.
I found some knits that I got from op-shopping that I had obviously been saving for this very top. I cut out and raced to the overlocker.

Joy from a Charm of Magpies also won a copy so we buddied up for some pics but I think we managed to goof off more that have photos taken…or maybe that was just me.

What we discovered is that my top is less batwing than Joys. Mostly because I cut the largest size and just assumed it would be close enough and Joy properly graded for her size. Lesson learnt for me.


Also I did the short sleeve and the band barely fits around my bicep.

I know I have guns but it is a little snug.

I do like this top and intend to make another just a little bit bigger.
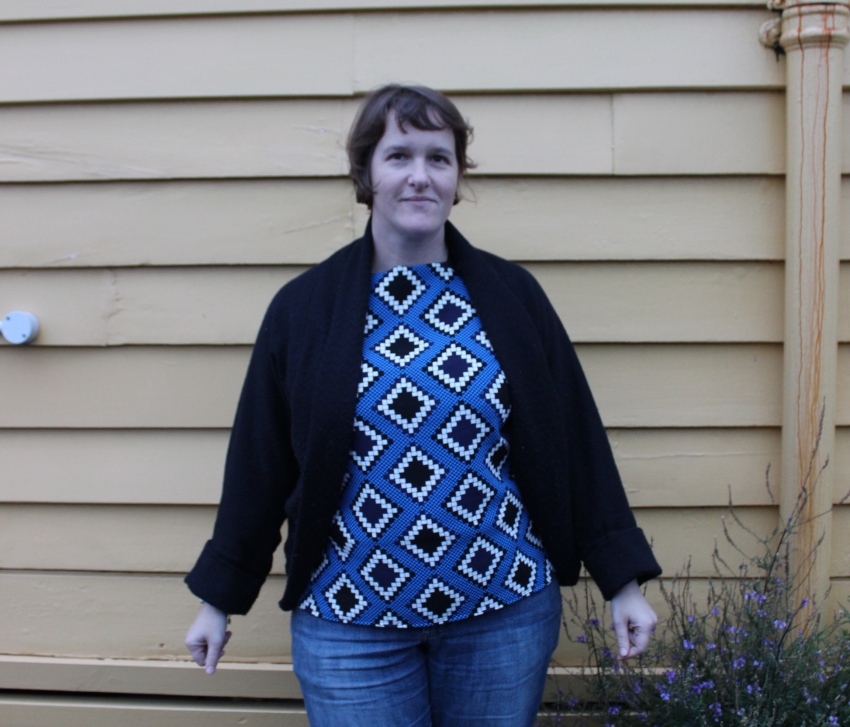
I was lucky to be asked to test the Jenna cardigan by Muse. I used from random stash knit in cream. I made the waist length, long sleeve option with front yoke. I loved all the options given and went with the one I thought I would wear the most – as it can go over all my pretty dresses.
 The sleeves are quite long and in the larger sizes can be quite wide. Once I had finished testing I took mine in from the elbow to the wrist in a wedge to give a slimmer look I prefer. I also unintentionally shortened them by adding my cuffs on inside a out and needing to cut them off – I wasn’t going to unpick all that overlocking.
The yoke was easy to put together – I gathered it on my normal sewing maching but them sewing the remaining of the cardi on the overlocker.
 The buttons were from a christmas swap from Juliet. I love how they are big and bold on a simple little cream cardi.
 This cardi helped me get over my fear of buttonholes and they all turned out great. I will be making another Jenna Cardi in the future – I just need to do the other twenty-something projects in the queue.

I first posted this in the Monthly Stitch …way back in June… but for completeness wanted to have it here on my blog as well.
Ever since I made my first Pavlova top by Cake patterns last year I’ve had plans to make another and when deciding what to make for Indie Pattern month’s fangirl competition I decided to go for it as it was once of the few patterns that I had more than one piece by the one brand. 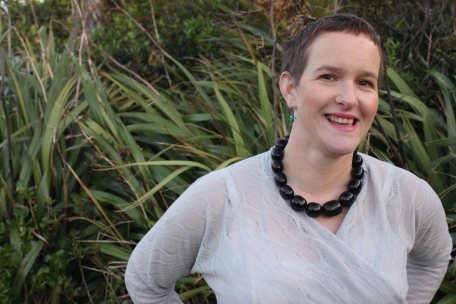
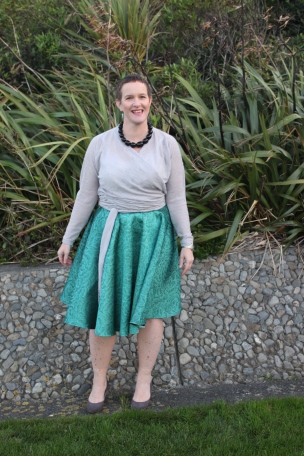
I used a grey light/lacy knit that I got for $3 a metre at the Fabric Warehouse sale last year. I wanted this top to be more versatile than my first version so I lengthened the bodice so it could wear with more of my skirts or jeans as I find it hits my waist and can leave a gap across my stomach with some clothes. I made the ties as long as I could fit on my fabric and I also lenthened the sleeves so they are wrist length instead of 3/4 length and put a cuff on them to finish it off.

The skirt is the Pavlova Skirt from Cake. I have made this before – most recently here – and my lesson learnt on this pattern is that I have to cut two sizes smaller than my measurements for it to work for me. I don’t know why Cake patterns cannot do basic maths to make a circle work, but after making three I am adamant it is not correct. You are better of using a circumference calculator and doing some simple maths yourself.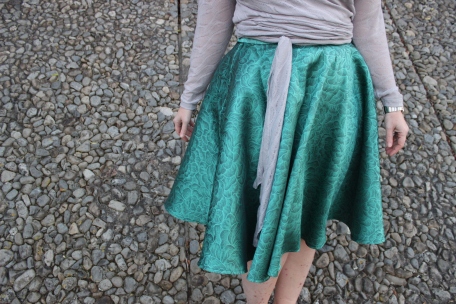
I used a fabulous brocade that I found on the sale table at spotlight for $8/m. I love the colour and the balance between the soft grey and the stiff brocade. A used a button from my stash for on the waistband. 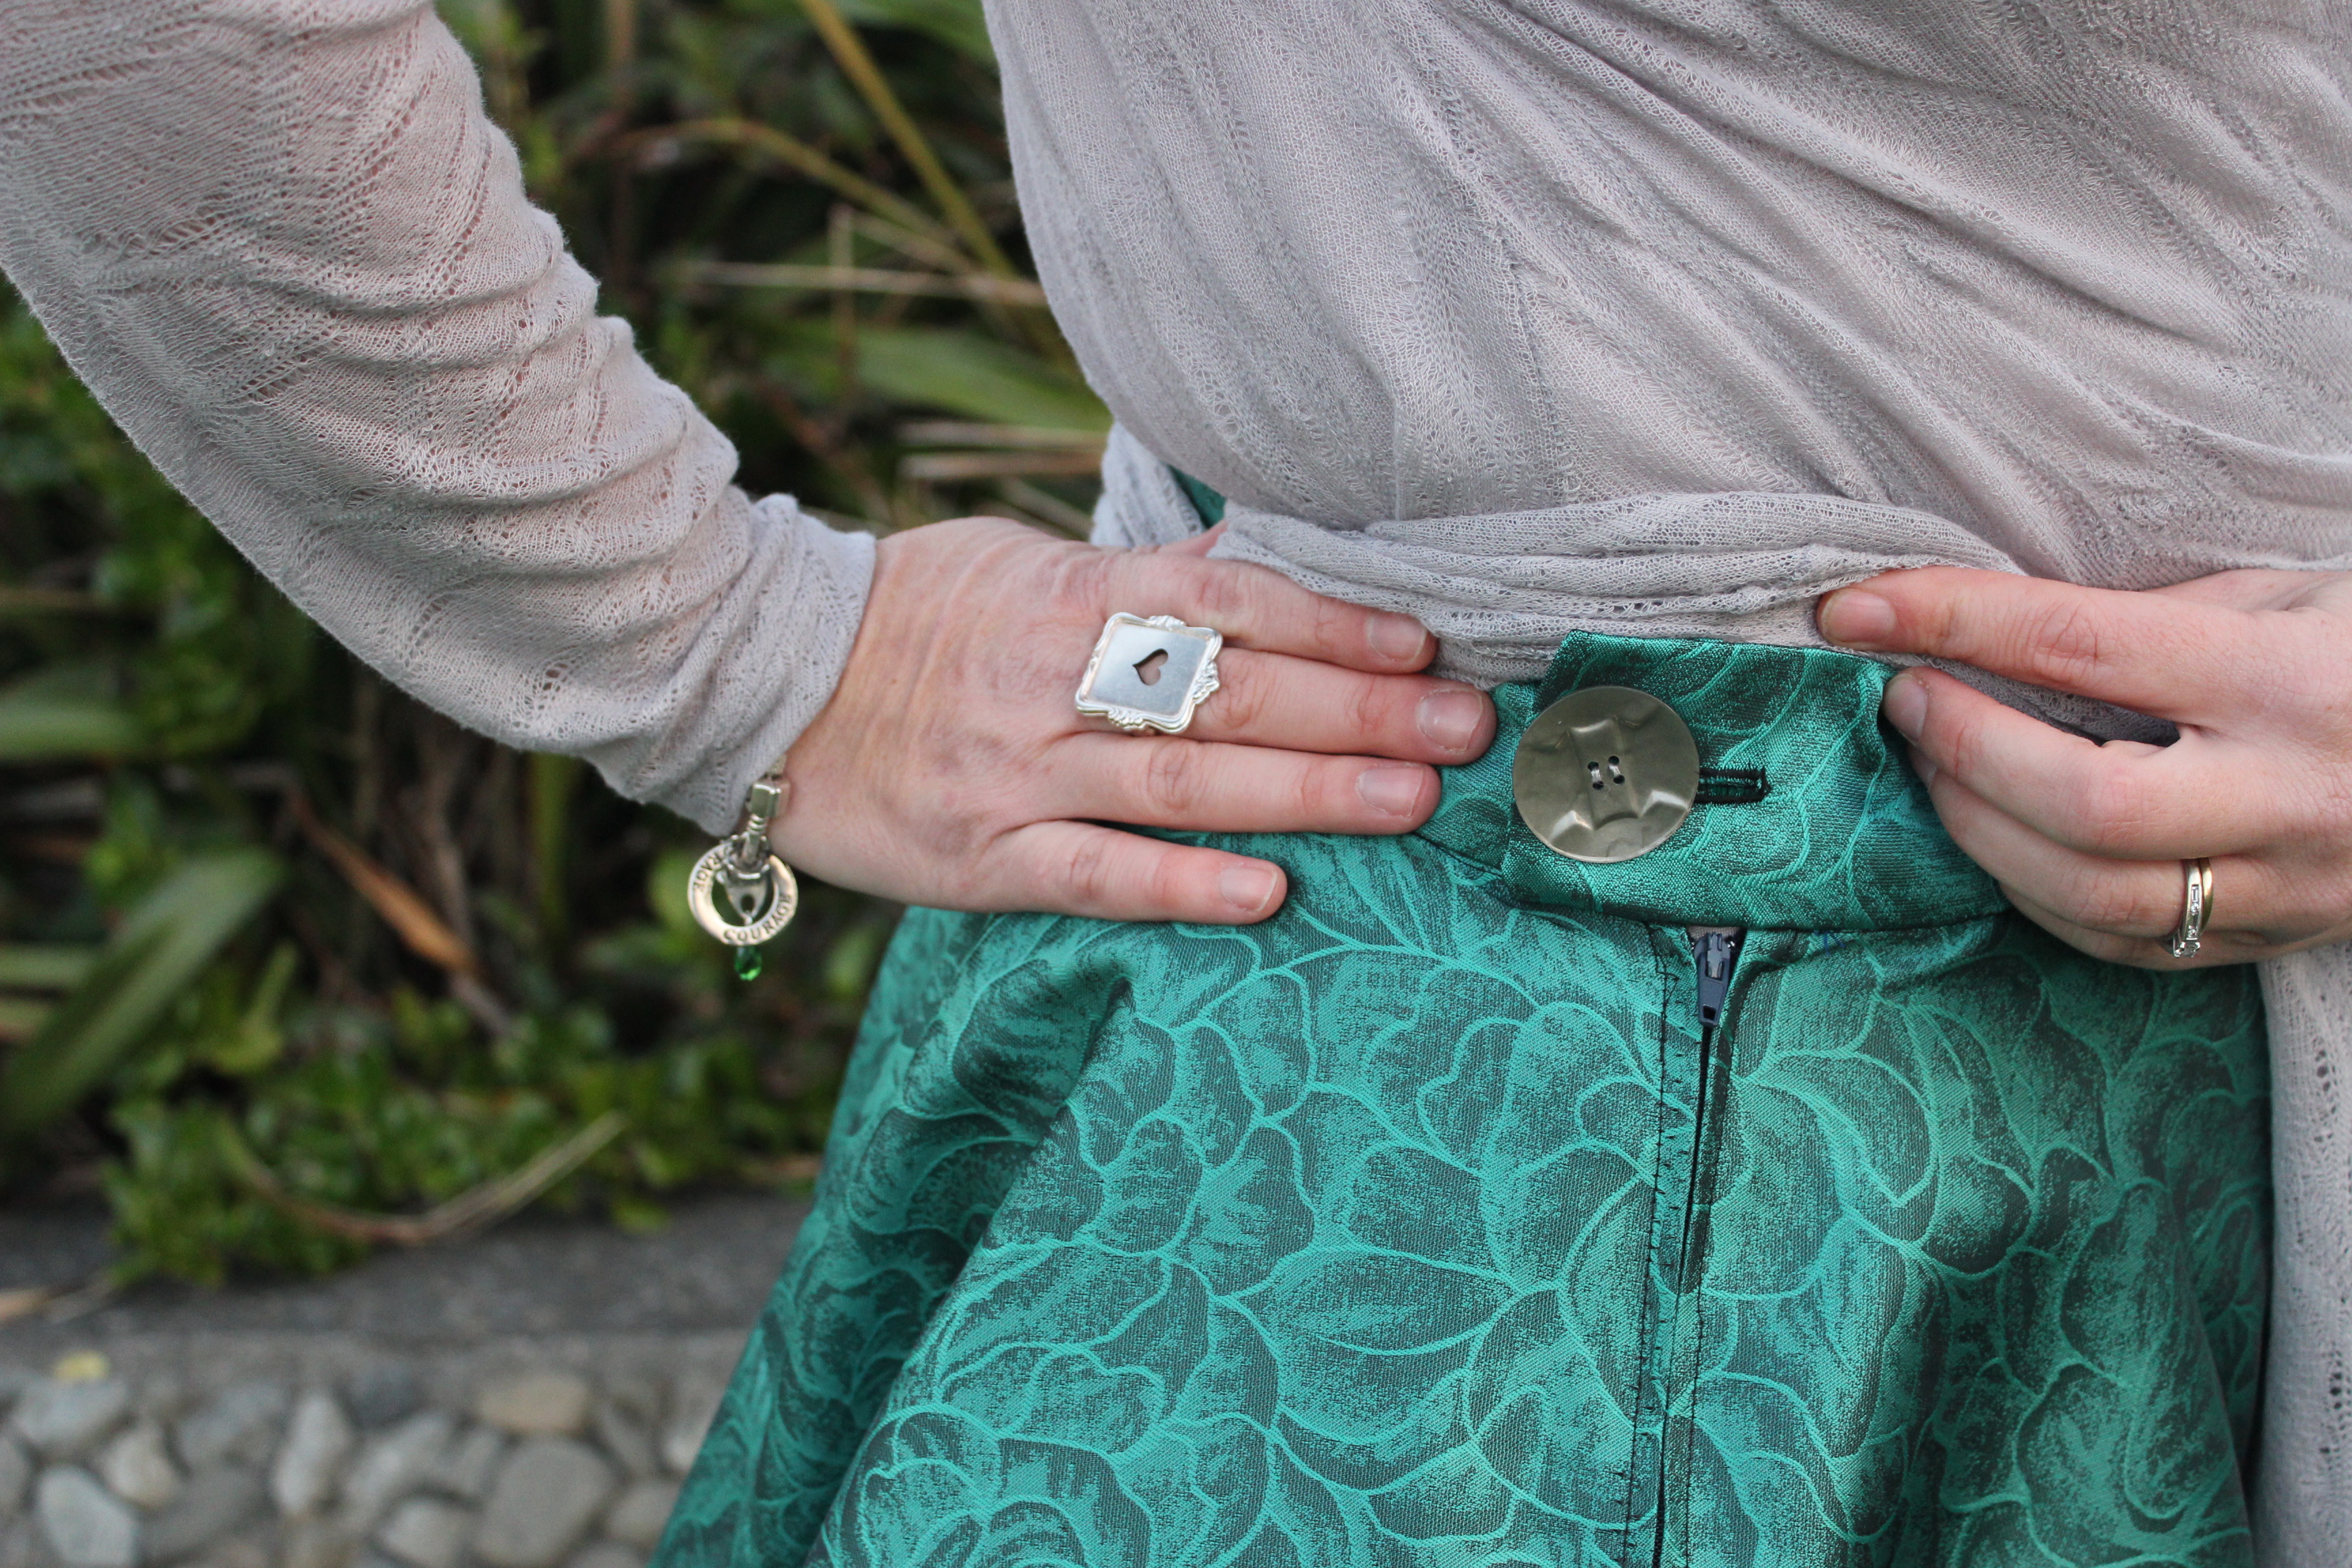
This outfit came together exactly as I wanted and I feel very glamorous in it. I have worn it out many times now and it is a firm favourite in my wardrobe
I first posted this suit a few days ago on the Monthly Stitch Indie Fan-Girl competion. If you have not voted yet pop over there and check out the great entries. Mine are ‘Miss Bella Chalmers’ and ‘In Cake all Over’ if you feel inclined.
So how did I come to the place of creating a bold floral suit? The first Papercut pattern I ever made was the Miss Chalmers skirt from the Home Sewn book. Then I saw the new Anima pants and I made some harem style pants. The final twist was seeing amazing versions of the Bellatrix blazer across the internet. I envisioned a fabulous floral suit all coming together nicely using the fabric I bought at the start of the year at Centrepoint Fabrics in Auckland. It is a cotton stateen with birds, large white flowers on a black background. A quick google search brought up MANY options for floral print suits and I was convinced I could make it happen.

Inspiration by Google
I made this production style… sewing as many seams as I could before ironing, overlocking and then sewing the next round of seams.

Piles of pretty pattern pieces
The Miss Chalmers skirt is a simple skirt the only change I made was to add 6cm to the length to make it more wearable for myself.

I did a quick muslin of the Bellatrix Jacket and went with the largest size. Making the muslin also helped me make a few mistakes early – like sewing the front bottom panels on the wrong way round and remember to cut all notches for ease of construction in the real thing.

The jacket is lined with silk/cotton from the Fabric Store and feels devine. The button is a green one from my collection.

Lovely lovely lining
I did not try to pattern match on this fabric, instead I attempted to cut the panels so there were birds or decent flowers on each one.

Wow look at that welt
I love this as a statement piece that can be worn with the skirt or with a little black dress, my green jeans or many other pieces in my wardrobe.

Finally the Anima pants… in this crazy birds and flowers! It is quite full on even for me who loves prints. But I think I can make it work, even if it gives you a headache if I wear it all at once.

This was the second time I had made the Anima pants so I knew my fit was right. I will post tomorrow how I made a knit pattern work in woven for a bottom my size.

Zippers about to fill the gap
However I wanted to make the ankle cuffs in cotton sateen not knit so added some metal short zips that I bought several years ago that were just waiting for this project to come along.

I didn’t do the rows of stitching on the waistband as I wanted to keep a clean look across the front.

You know you want one now… a crazy floral and birdie covered suit!

Loose casual pants are in every store at the moment. Some are very casual but many are work wear. As this is the unofficial year of Pants for me I decided to give the Anima pants by Papercut Patterns a go. I also seem to keep getting theme songs stuck in my head and for these pants it was Animal by Def Leppard
A wild ride, over stony ground
Such a lust for life, the circus comes to town
We are the hungry ones, on a lightning raid
Just like a river runs, like a fire needs flame
I burn for youI gotta feel it in my blood whoa oh
I need your touch don’t need your love whoa oh
And I want and I need And I lust animal
And I want and I need And I lust animal
Not the most classy lyrics but they were on high repeat in my head. Now that I have it stuck in your head I will go on about these fabulous pants.
I got a harem pant pattern from the op-shop that I thought would make up into stylish casual pants as per the current fashions – like below.

So I decided to test it using some of the huge roll of lightweight black knit I got second hand. It was a simple pattern and I proudly wore them upstairs to show my husband. His response: “Cool – you have made some trackies” (tracksuit pants) 
This was not the response I was looking for – nor were the pants the look I was going for so they are now my never leave the house pants. 
A month or so later I saw the Anima pant pattern and although it is designed for knits I knew I could make it work as the fashionable pants I desired. I dug out this black rayon with white and green flowers from the stash and got to work singing the song above.

I am right on the upper edge of Papercut sizing with my bottom and making it in a woven added another variable so I took the pattern pieces from my smooth sailing pants that I knew fitted well and overlapped them on the Anima pieces. The J-curves of the crotch matched nicely – I just had to add 4cm to the front and back side seams in the waist and hip. I maintained this increase all the way down to ensure they fitted around my calves. I added this increase to the waistband and ankle cuffs as well which I cut out of black knit. 
The only other change I made was after trying them on I found the ankle cuff was a bit flappy at the bottom, so I pinned it in and then sewed out a wedge from the bottom to the top of the cuff. I over locked the excess and it fitted perfectly. It means that is is no longer all enclosed in the cuff but I have altered my pattern piece for the next time – as there will be a next time. 
I made this version before the Floral Suit as a wearable muslin and the are very wearable. 
And I will be making more as they rock! 
I want to show you my new Pendrell top. It is the first time I have sewed a Sewaholic pattern and I got got it from Dresses and Me a few months ago…what do you mean you can’t see it….
How about now… No?

Okay…winter is definitely coming to Wellington and I am about to show off my new short sleeve blouse…

I used a quilting cotton from the sale table at Spotlight and the only intentional adjustment I made was to take 8cm off the length as this is a very long top. I did make one other small change… I added a keyhole feature to the neckline which is held shut with an awesome brooch from Smash Palace who use old plates to make their jewelry.

I created this feature as I had an overlocking incident when finishing my inside seams and I accidentally cut a wedge out of the front neckline. I just curved out the missing chunk and bound the edge before binding the rest of the neck.

I will definitely be making another one of these – hopefully without any extra alterations. I also made another Pavlova skirt by Cake Patterns to go with this top. After the first one not fitting I wanted to give it another go as I really want a circle skirt that fits. I re-took my measurements, re-read the instructions and cut into some burgundy wool from the stash. I sewed the side seams and tried it on.
 The pin above shows where my side seam should be…8cms from where the current side seam is. This means the skirt is 16cm too big for me. The pattern states it has 2 inches of ease – which seems too much in my opinion – but 16cm = over 6 inches! So I put all instructions aside, cut off the offending inches and made up the rest as I went along.
In my random making up I didn’t leave a big enough gap for a zip so I went old-fashioned and put domes in and a hook closure with non-functioning button on top.

Now I have a circle skirt that fits.
My challenge to myself this year was to make pants. My other challenge was to continue my 52 dresses project. It is now May and this is the first time you are hearing about my pants challenge… I think you understand where my priorities lie. But sometimes pants are necessary and the only ones in my wardrobe are a pair of jeans that fit and two pairs of coloured pants that are too big, so I decided to make some black workpants.
The Dreamstress runs regular classes at Made Marion and she had a spot available for Wide Legged Pants at the start of this year. This class was a great way to first look at pants. It uses the Wearing History pattern Smooth Sailing pants which is available as a PDF download. These pants have lovely clean lines and I really like the look. Leimomi had us make a muslin and assisted on fit. It was only three changes in seam lines to get a great fit on me. I was really happy to have expertise on hand for these changes.

I had a few mishaps when I was putting in my pockets – the first was when I cut the top corner if the pockets from my black fabric and paid no attention to the grain – the black wool blend has a directional grain that is subtle but becomes really obvious when you put it horizontal by mistake. So that got unpicked.

The second was when I was using a funky lining fabric for the pockets – it was a slippery polyester that I thought would look great, except it was too light weight, moved all over the place and would not let me top stitch the edge of the pockets nicely. So that got unpicked.

Finally I found some cute scissors cotton in the stash, re-cut my pockets, carefully checked the direction of the black panel at the top and voila – just like that i bad beautiful pockets!
The next speed bump came when I went to attached the waist band, as I had extended the waist to fit on the pants, I thought when I cut the waistband I had matched this increase…. can you see what is coming? I sewed the wasitband, interfaced, pressed and all that and pinned it to the pants to attach it and TA-DAH! It was two inches short. I put the pants in the naughty corner and carried on making other things.

But I would not be beaten! so I re-cut the waistband with a generous length so I could have room for error and attached it. I used the blind hem function on my sewing machine and a great tutorial from Coletterie

Finally I finshed my pants… and it is not love at first sight, I do kind of like them. I am not sure if it is just the fact that they are trousers which is unusual for me or this particular pair. I think I need to try again in a different material and also try another pattern..watch this space .
Also my favourite pants clip from the interwebs… Stefon from Saturday Night Live…it kind of explains my title.
I was inspired by Jenna a fellow WSBN blogger to make this tee without her even realising it.

She was wearing a similar RTW top the other day and it was just the push I needed to create my own lace yoke tee or the Jenna Tee. I used an op-shop 1980s pattern as the base – Simplicity 7449 (photo in evernote), view 3, as it had a great yoke.
 The black lace is from a friend and has flocked flowers on it. The grey knit is from a Starfish workroom sale a few years ago, it is very soft and the stitches just sunk into it. I had to re-do the neckline after sewing on the binding on the wrong side, I just cut it off close to the stitches and cut a new bit of black knit fabric.

I will make another of these tees and next time I will round off the shoulders a little to reduce the size of the armhole as it is a bit wide and gaping.
After these photos I went from this…to this

to this

Now onto the winning…I recently went to a book fair and there was a set Pattern Designing books that caught my eye, I snapped them up and then saw there was a second copy of one of them, so got that too and decided to give it away to one of you. The book is More Dress Pattern Designing by Natalie Bray.
The blurb from Amazon is “The techniques Natalie Bray pioneered and perfected revolutionised dress pattern designing, assisting the rise of the modern fashion industry. Her teaching has had a profound influence on design, production and education and her works are classics: fashions change but the principles of designing patterns in the flat do not.
This book covers advanced cutting, lingerie, tailoring and children’s clothes. It expands the basic course set out in Natalie Bray’s Dress Pattern Designing and shows the application of the basic principles and methods to more advanced styles as well as to specialised cutting.”

If you would like to win this along with piece of fabric from the stash (when I dive in) then let me know what inspires you in your sewing. I will randomly draw a winner on Saturday 29th March and am happy to post internationally.
